
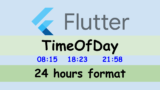
There are many packages in pub.dev for date time picker but Flutter offers beautiful date and time pickers. We actually don’t have to install external packages that might cause some bugs or difficult to adjust the behavior for our own applications. So I tried to implement the Flutter default date-time pickers. The implementation is easy for the basic features.
Let’s learn how to implement it together with me.
Full code can be found here.
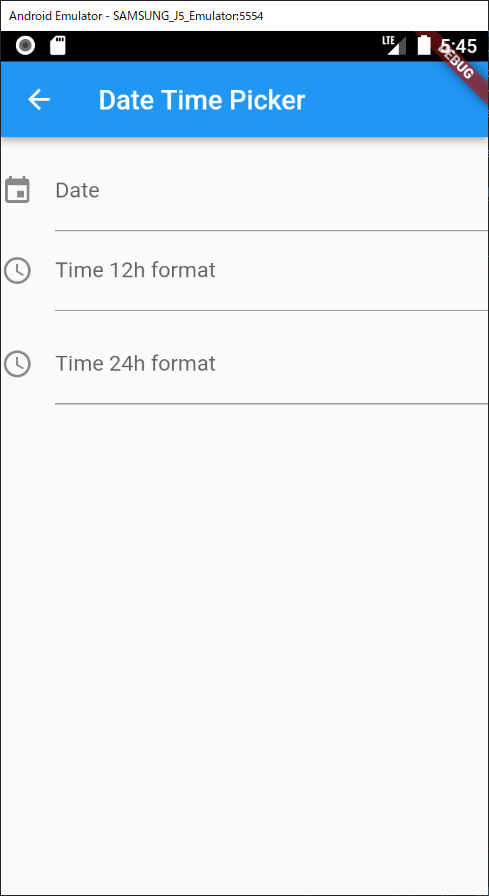
https://github.com/yuto-yuto/flutter_samples/blob/main/lib/date_time_picker.dartWhole picture for the view
This is the layout for the view.
final _dateController = TextEditingController();
final _timeController1 = TextEditingController();
final _timeController2 = TextEditingController();

Widget build(BuildContext context) {
  return SafeArea(
    child: Scaffold(
      appBar: AppBar(
        title: Text("Date Time Picker"),
      ),
      body: Column(
        children: [
          SizedBox(
            height: 10,
          ),
          _datePicker(),
          _timePicker(
            controller: _timeController1,
            label: "Time 12h format",
            alwaysUse24HourFormat: false,
          ),
          SizedBox(
            height: 10,
          ),
          _timePicker(
            controller: _timeController2,
            label: "Time 24h format",
            alwaysUse24HourFormat: true,
          ),
        ],
      ),
    ),
  );
}
The code and the view are simple.
Implement DatePicker
We probably want to show the date somewhere. It’s generally a Text widget. Therefore, I defined a controller for TextField. However, we want to pick a date on a calendar, so it should be read-only.
final _dateController = TextEditingController();

Widget _datePicker() {
  return TextField(
    controller: _dateController,
    readOnly: true,
    decoration: InputDecoration(
      labelText: "Date",
      icon: Icon(Icons.event),
      hintText: "Date",
    ),
    onTap: () async {
      // open the date picker
    },
  );
}
Let’s implement onTap callback listener. We have to open a calendar here. showDatePicker function shows the calendar and handles a user action.
onTap: () async {
  final selectedDate = await showDatePicker(
    context: context,
    firstDate: DateTime(2000),
    lastDate: DateTime(2100),
    initialDate: DateTime.now(),
    selectableDayPredicate: (day) => day.isBefore(DateTime.now()),
  );
  if (selectedDate != null) {
    setState(() {
      _dateController.text = DateFormat.yMd().format(selectedDate);
    });
  }
},
The first 4 are the required parameters. firstDate and lastDate determines the date range where a user can pick.
initialDate is clear what indicates. Set a DateTime that the calendar selects when it opens.
We probably want to disable dates according to special conditions. For example, when it is not working day, when a hotel is full on the day, and so on. We can set our own conditions to selectableDayPredicate for the limitations. In this example, a future date can’t be selected.
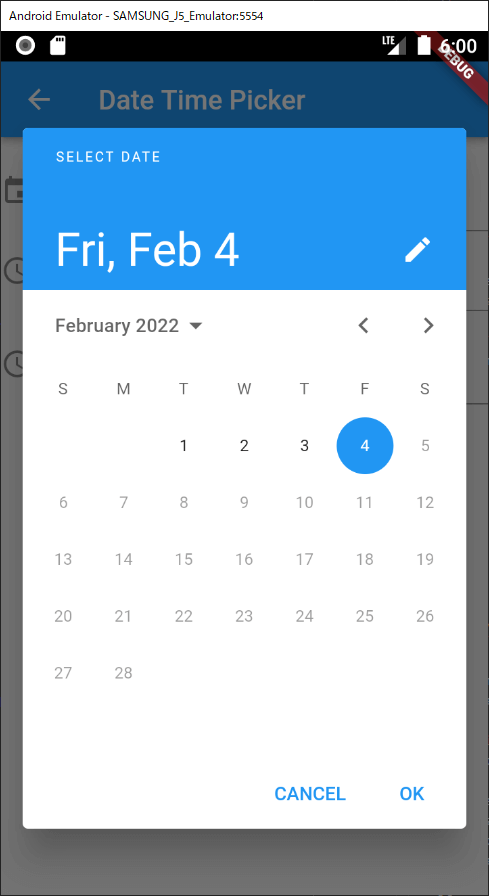
showDatePicker can return a null value because a user might press the CANCEL button. Call setState function after the value check in order to update the view without any problem.
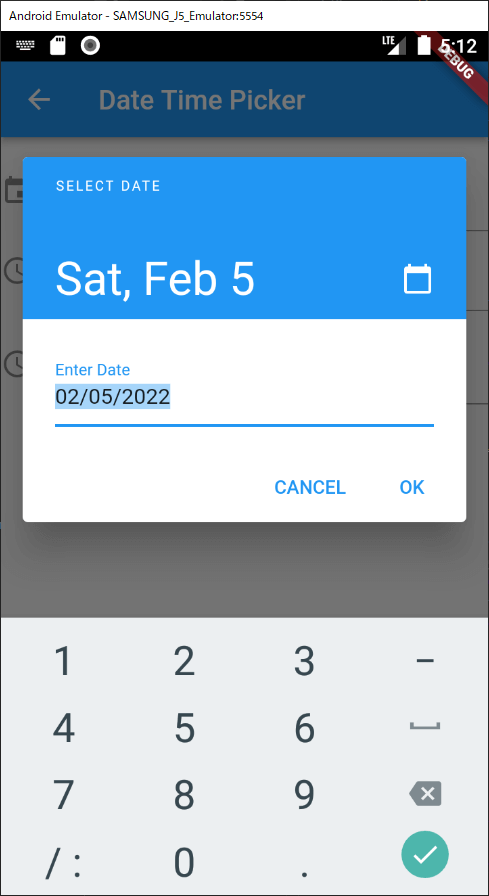
When pressing a pencil icon, the UI switches for manual input.
The example above uses DateFormat. If you are not familiar with it, this article might be helpful.
The behavior of the date picker looks like this.
Implement TimePicker
The implementation for TextField is the same as the date picker. I skip it for a time picker.
We use showTimePicker instead of showDatePicker.
onTap: () async {
  final selectedTime = await showTimePicker(
    context: context,
    initialTime: TimeOfDay.now(),
    builder: (BuildContext context, Widget? child) {
      return MediaQuery(
        data: MediaQuery.of(context)
            .copyWith(alwaysUse24HourFormat: alwaysUse24HourFormat),
        child: child!,
      );
    },
  );

  if (selectedTime != null) {
    final text = alwaysUse24HourFormat
        ? selectedTime.to24hours()
        : selectedTime.format(context);
    setState(() {
      controller.text = text;
    });
  }
},
Required parameters are only two. We need to set context and initialTime. If we have a DateTime for the initial value we need to convert it to TimeOfDay.
The following post explains how to convert a DateTime to TimeOfDay and how to show TimeOfDay in 24 hours format. to24hours() method used in the example above is an extension method that I defined. Check this post as well if you want to know the implementation.
The following part is needed if we want 24 hours format. It creates a clone and sets a property.
builder: (BuildContext context, Widget? child) {
  return MediaQuery(
    data: MediaQuery.of(context)
        .copyWith(alwaysUse24HourFormat: alwaysUse24HourFormat),
    child: child!,
  );
},
Let’s check the difference between the property true and false.
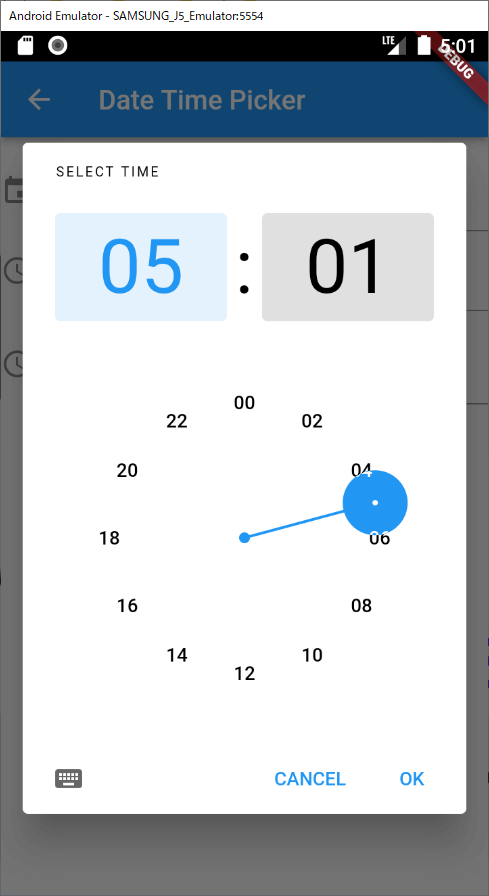
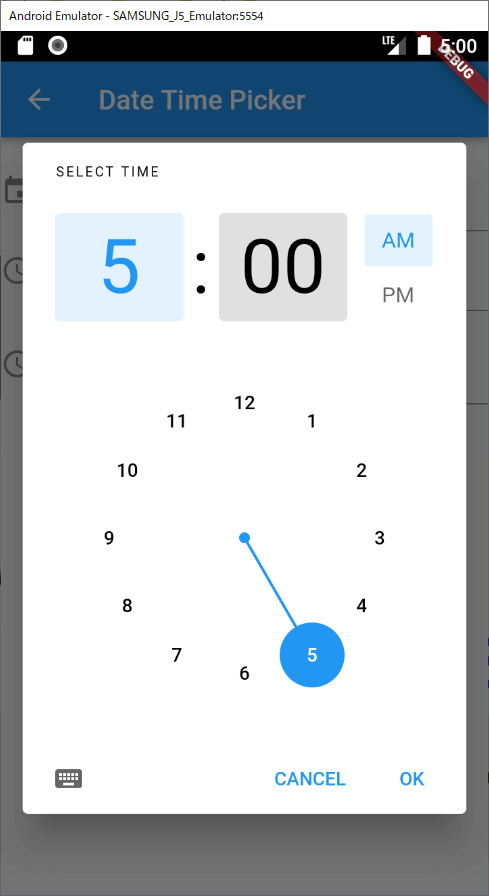
Which one do you prefer? If the property is false, AM/PM selector is shown and the clock shows numbers 1 to 12 that we often see on a wall clock.
On the other hand, if the property is true, the selector isn’t shown and only even numbers are shown. It is a bit harder to select an odd number.
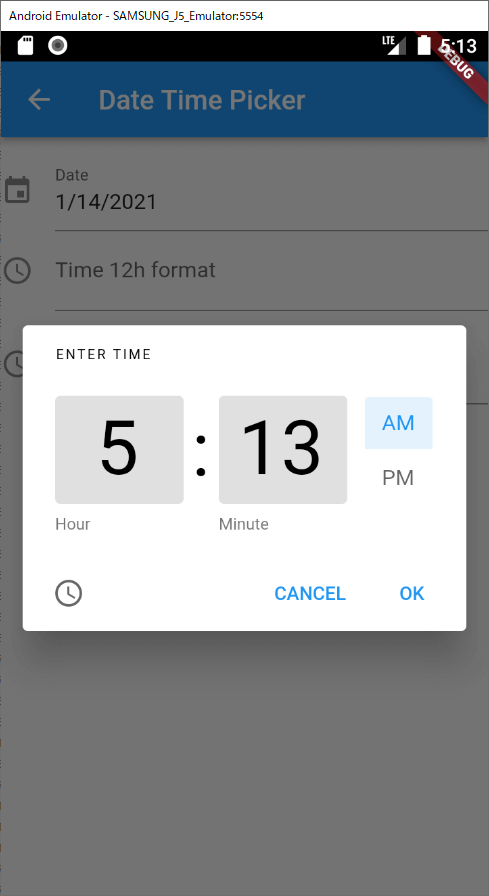
When pressing a keyboard icon at the left bottom, the UI switches and we can input desired time there.
The focus immediately switches to time after selecting the hour. I wanted to disable the function but it is not possible. I found the code below in time_picker.dart. This is set to an event listener and there is no parameter to handle the case.
void _handleHourChanged(String value) {
  final int? newHour = _parseHour(value);
  if (newHour != null && value.length == 2) {
    // If a valid hour is typed, move focus to the minute TextField.
    FocusScope.of(context).nextFocus();
  }
}
This is the behavior.
End
When I searched date time picker, many packages are shown at the top of the Google result and thus I thought Flutter didn’t offer the default feature but actually does.
It is easier to implement it than I thought. If we are satisfied with the UI, we don’t have to add new packages and we can save the size of the application.
Comments