It’s common to let a user swipe a list item for more options in smartphone applications. For example, we can archive an item in Gmail. Flutter offers a Dismissible class for the feature. We will implement it to let a user swipe a list item in both directions, namely left to right and right to left.
You can find the complete code here.
Dismissible Widget with minimal code
First of all, let’s check how Dismissible widget works with the minimal code.
class SwipeListItem extends StatefulWidget {
  @override
  _SwipeListItem createState() => _SwipeListItem();
}

class _SwipeListItem extends State<SwipeListItem> {
  GlobalKey<ScaffoldState> _key = GlobalKey();
  List<int> _data = [for (var i = 0; i < 50; i++) i];

  @override
  Widget build(BuildContext context) {
    return SafeArea(
      child: Scaffold(
        key: _key,
        appBar: AppBar(
          title: Text("Swipe List Item"),
        ),
        body: _createBody(context),
      ),
    );
  }

  Widget _createBody(BuildContext context) {
    final count = _data.length;
    final countDisp = Text("Count: ${_data.length}");

    final listView = ListView.builder(
        itemCount: count,
        itemBuilder: (context, index) {
          return Dismissible(
            key: ObjectKey(_data[index]),
            child: ListTile(
              title: Text("Item number - ${_data[index]}"),
          );
        });

    return Column(
      children: [
        Center(child: countDisp),
        Flexible(child: listView),
      ],
    );
  }
}
The items can be swiped in both directions but the background of the items is white. The count keeps showing 50 even though the items look deleted. We need to implement them ourselves.
Add background colors and icons
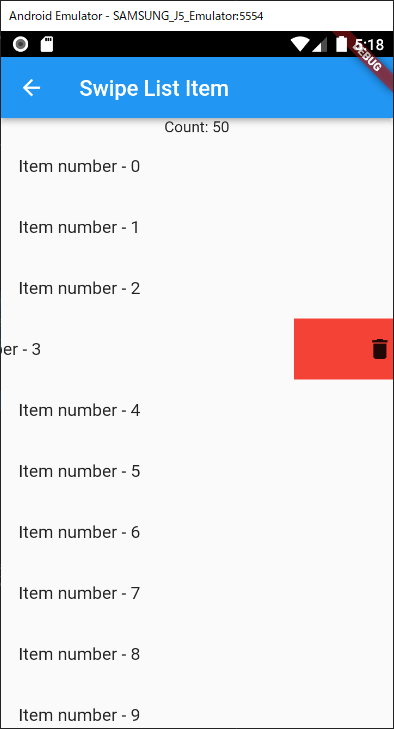
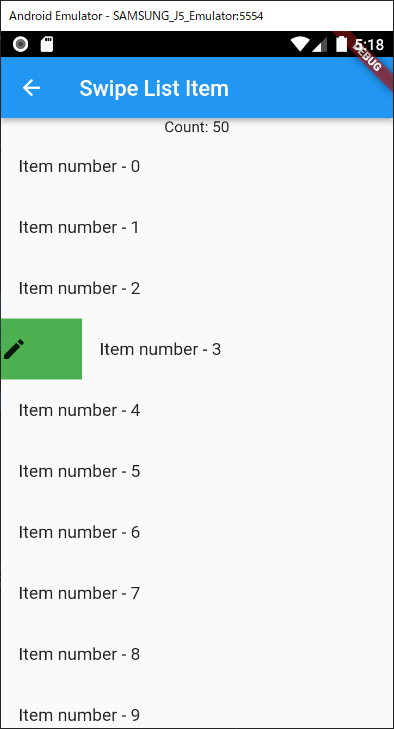
Let’s show the delete icon with red color when swiping an item from right to left. The widgets for the icons are as follows.
final leftEditIcon = Container(
  color: Colors.green,
  child: Icon(Icons.edit),
  alignment: Alignment.centerLeft,
);
final rightDeleteIcon = Container(
  color: Colors.red,
  child: Icon(Icons.delete),
  alignment: Alignment.centerRight,
);
Wrap the icon by a container and set the alignment. Set the widget to background and secondaryBackground.
return Dismissible(
  key: ObjectKey(_data[index]),
  child: ListTile(
    title: Text("Item number - ${_data[index]}"),
  ),
  // left side
  background: leftEditIcon,
  // right side
  secondaryBackground: rightDeleteIcon,
};
Add logic when a list item is dismissed
The next step is to add logic to delete an item. We need to set a function to onDismissed parameter. Since it passes direction parameter, we can define different behavior for left-right and right-left directions.
onDismissed: (DismissDirection direction) {
  if (direction == DismissDirection.startToEnd) {
    // Left to right
    print("Edit");
  } else if (direction == DismissDirection.endToStart) {
    // Right to left
    print("Delete");

    setState(() {
      _data.removeAt(index);
    });
  }
},
As you can see, count is decremented when swiping an item to the left side. The item is not deleted if it is moved to the right side.
Note that the following error occurs when the view is loaded if the item is immediately not deleted.
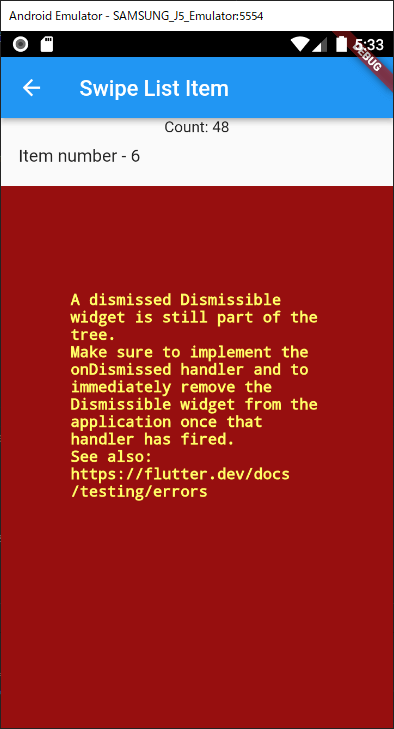
════════ Exception caught by widgets library ═══════════════════════════════════
The following assertion was thrown building Dismissible-[int#00007](dirty, dependencies: [_EffectiveTickerMode, Directionality], state: _DismissibleState#e9fd1(tickers: tracking 2 tickers)):
A dismissed Dismissible widget is still part of the tree.
2

Make sure to implement the onDismissed handler and to immediately remove the Dismissible widget from the application once that handler has fired.

The relevant error-causing widget was
Dismissible-[int#00007]
lib\swipe_list_item.dart:46
Add UNDO feature
We definitely want to add undo feature because a user might delete an item by mistake. Maybe, do you want to show the undo button at the bottom? Let’s use a Snackbar widget for it.
onDismissed: (DismissDirection direction) {
  if (direction == DismissDirection.startToEnd) {
    // Left to right
    print("Edit");
  } else if (direction == DismissDirection.endToStart) {
    // Right to left
    print("Delete");

    setState(() {
      int deletedItem = _data.removeAt(index);

      ScaffoldMessenger.of(context)
        ..removeCurrentSnackBar()
        ..showSnackBar(
          SnackBar(
            content: Text("Deleted \"Item number - $deletedItem\""),
            action: SnackBarAction(
              label: "UNDO",
              onPressed: () {
                setState(() => _data.insert(index, deletedItem));
              },
            ),
          ),
        );
    });
  }
},
Double dots are useful if we want to call methods in a row for the same instance. As I mentioned above, the dismissed item must immediately be deleted, therefore we have to insert the data again if we want to undo it.
How to implement undo with database
We definitely need to interact with a database. In this case, it’s not good to delete the entry from a database and insert the data again because the data entry can be different if some of the values are assigned automatically. I think we should do the delete process if a user doesn’t undo it.
onDismissed: (DismissDirection direction) {
  if (direction == DismissDirection.startToEnd) {
    // Left to right
    print("Edit");
  } else if (direction == DismissDirection.endToStart) {
    // Right to left
    print("Delete");

    late int deletedItem;
    setState(() {
      deletedItem = _data.removeAt(index);
    });

    // Set timer here
    final timer = Timer(
      Duration(seconds: 3),
      () {
        // Call SQL query here
        showMessage(
          context,
          "Execute delete query for database",
          "Database Access here",
        );
      },
    );

    ScaffoldMessenger.of(context)
      ..removeCurrentSnackBar()
      ..showSnackBar(
        SnackBar(
          // Set duration. It should be shorter than the timer's one
          duration: Duration(
            seconds: 2,
            milliseconds: 500,
          ),
          content: Text("Deleted \"Item number - $deletedItem\""),
          action: SnackBarAction(
            label: "UNDO",
            onPressed: () {
              // Call cancel if a user presses undo
              timer.cancel();
              setState(() => _data.insert(index, deletedItem));
            },
          ),
        ),
      );
  }
},
The duration specified in the Snackbar should be shorter than the timer’s one. If we set the same value to both, undo can fail because the timer starts before Snackbar’s timer starts.
If we need to interact with a database, the data is Future value. In this case, we should call the query in initState() method in order not to call it again after we delete the item. Otherwise, the view doesn’t change.
How to handle editing
The item must immediately be deleted when it’s dismissed. If we want to edit an item, we need to prevent it from dismissing. We can define logic in confirmDismiss parameter to decide whether it’s dismissed or not.
confirmDismiss: (DismissDirection direction) async {
  if (direction == DismissDirection.startToEnd) {
    await showMessage(context, "Go to edit page", "Edit");
    return false;
  } else {
    return Future.value(direction == DismissDirection.endToStart);
  }
},
For the editing process, we always have to return false in order not to call the onDismissed event. Do the editing process on a different page. Once the process is done, go forward the process again and return false. If the item is updated, we need to set it to the current item within setState. Don’t forget to call setState to update the view.
If we want to allow a user to swipe only one direction, we can set it to direction parameter.
direction: DismissDirection.endToStart,
Comments